Translate

Sunday, April 26, 2020

COVID Quarantine : Dymaxion Hellstar 5.0 Recipe

The Belgian Quad (Boxer Rumble) continues to ferment away. The airlock still bubbles, and when I look under the blanket, it is still quite foamy. I won't bottle it until the yeast has exhausted itself in the secondary.

still bubbling

As usual, if you just want the recipe, please go to the end.

Next weekend is the annual Big Brew celebration for homebrewers. As an AHA member, I'm debating if I want to join in, as I still haven't bottled Boxer Rumble, and we also have the rest of my Smoldering Cupid as well as Pat's Intensive Purposes

I'm half-thinking of trying the Quarantine IPA recipe or maybe just brewing a batch of either Smoldering Fire or Dymaxion Hellstar 5.0

I haven't done Dymaxion Hellstar 5.0 for a while. It's my Starfruit IPA recipe, and I know I still have some starfruit in the freezer.

First off, I should explain my beer names. Most of them are car related; Blown Turbo Seal, Duryea 13, and Boxer Rumble are all examples of the car related ones. Others are related to beers I brew for special occasions, usually for something related to my #404Family, that is, my Capitals Season Ticket Holder "family." We go out of town for various things, such as Hershey Bears games or out of town Caps games or even road trips together. So beers like #404Family Hershey Road Trip and #404Family Komrade Stanley are for those. 

Dymaxion Hellstar 5.0 was supposed to be a #404Family beer, in commemoration of a Roanoke road trip to the Deschutes brew pub there. That was the whole point of the starfruit; Roanoke is the Star City, and the starfruit was the ingredient that went along with that. But, for whatever reason, the road trip failed to materialize, but the beer was brewed. It needed a new name. 

Buckminster Fuller, a prominent scientist known for the geodesic dome shape, also believed in the dymaxion ideal of minimal energy input for maximum advantage. He attached the term to a multitude of things, including a house, a journal, a sleep schedule and, yes, a car. It was not a pretty car. That's where Hellstar and 5.0 come in. 

not a pretty car at all; in fact, considered a death trap (from wsj.com)

My first Dymaxion Hellstar recipe was a half-assed attempt to do something similar to the old DuClaw Brewing beer I loved so much, Hellrazer. I did intend to use starfruit in the original, but they weren't in season, and so I just went with the rest of the recipe, intending to use the same recipe later, just adding starfruit. Except, I wasn't happy with how it turned out. 

So, I retooled it, and tried again. With starfruit.


A post shared by Karen (@kiirenza) on


A post shared by Karen (@kiirenza) on

I kept the hops pretty much the same as the first recipe, but I redid the grains. The new version was a lot better, and that's where the "5.0" comes in. 

When I first started autocrossing, it was in 1993. My boyfriend at the time had a pretty plain looking car he'd bought new, and because it was a coupe, a lot of people obviously thought the driver (him most of the time, but me occasionally, and even my brother once) had stuck 5.0 badges on it, when it still had them.

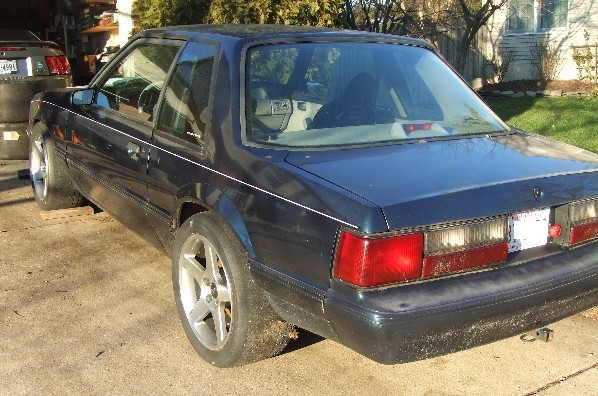
1992 Ford Mustang LX 5.0 sleeper
This is the car I learned to autocross in, and learned to drag race in. I did a 12.73 at 75-80 Dragway in this car. I put this car sideways on Clemsonville Rd, goofing off by myself. My brother devastated a trash talker at a former place of work with this car. I still have a soft spot in my heart for Fox-body coupes because of this car. 

I digress. The 5.0 for Dymaxion Hellstar 5.0 just denotes a better, more powerful version, just like the Ford Mustang LX 5.0 was a better, more powerful version of the 4-cylinder Mustang LX.


View this post on Instagram

A post shared by Karen (@kiirenza) on

So, without further talk, here's the recipe for Dymaxion Hellstar 5.0.... if you can find the magic ingredient of starfruit!

Dymaxion Hellstar 5.0

Ingredients List
  • 1 lb Caravienne, crushed
  • 1 lb Carapils, crushed
  • 3.3lb CBW Pilsen Light liquid malt extract (2)
  • starfruit (5 or about 5lb total)
  • 1oz. Galena hops (2)
  • 1oz. New Zealand Motueka hops (3)
  • White Labs California Ale yeast (WLP001)
  • 5oz. of priming sugar (corn sugar)
Bring ~2.5 gallons of water to between 145-150F. Using a cheesecloth bag, steep the grains for 30 minutes. Squeeze the grain bag as it is removed. 

Bring the wort to a boil. While stirring, add the liquid malt extract and two starfruit (~1.5lb), sliced. If necessary, return to boil.

Set a timer for 60 minutes. Quickly add 1oz of Galena hops and start the timer. After 15 minutes, add another 1oz of Galena hops. After 15 more minutes (total of 30 minutes elapsed), add 1oz of New Zealand Motueka hops. After 30 more minutes (at the end of the 60 minutes), remove the wort from heat and start cooling in sink by surrounding the brewpot with ice. 

While the wort is cooling, sanitize the primary fermentation bucket, siphon, thermometer and any other utensils that will be used. Add about 1.5 gallons of cool water to the fermentation bucket. Once the wort is about 80-90F, use a siphon to transfer it to the fermenting bucket. Avoid adding the dregs (hops) from the bottom of the pot. Add cool water to bring the total volume to about 5 gallons, then stir with sanitized paddle or spoon to make sure wort and water are mixed. Check the specific gravity; it should be about 1.045-1.055.

Once the wort is below 80F (check with a sanitized thermometer), pitch the yeast, then close the fermenting bucket. 

After ~7 days at 68-72F, use a sanitized siphon to transfer the beer to a sanitized secondary fermenting vessel. Take a sample to check the specific gravity. Avoid transferring the dregs from the bottom of the bucket. Add in ~3 starfruit (2-3 lbs) that have been cut up into slices or cubes. Seal the secondary vessel (cover with a blanket if necessary). Specific gravity should be about 1.010-1.015.

After ~5-7 days at 68-72F, transfer the beer to a bottling bucket. Boil 5oz. of priming sugar in 2.5cups of water; cool and then add to the beer. Mix with a sanitized spoon or paddle. Sanitize and dry all bottles to be used, as well as the caps if not using swing-top bottles. Fill each bottle just to where the neck of the bottle begins, then cap. You can check the specific gravity one more time; it should still be in the 1.010-1.015 range.

Let the bottles stay in a cool (68-72F) and dark area for at least a week and a half for carbonation. It's better to wait at least two weeks before refrigerating any of the beer and enjoying it. 

Let me know if you try the recipe! And check out my previous post that includes information about basic equipment if you need it!

If you find that Maryland Homebrew doesn't ship to your address for some reason, and you don't have a homebrew shop local to you so you want to order materials via Amazon, here's a shopping list for you to get started. Please try to shop local, though; you can't be guaranteed that things you buy via Amazon will be fresh!


Sunday, April 19, 2020

COVID Quarantine : Smoldering Fire Recipe

While the Belgian Quad (Boxer Rumble) is winding down in the secondary fermenter, it's still not quite ready for bottling. So, I guess I'll post up my base Smoldering Fire recipe for anyone who wants to try it. This was my first try at doing something other than a kit, and it turned out good enough that I've brewed it several times now, plus made a few variants.

If you just want to see the recipe, scroll to the bottom!

This started because I wanted to brew something with cinnamon. Don't ask why, it was just an idea I had. Even more odd was that I wasn't looking to brew an IPA, but something like a pilsner or lager.

So, I looked up some lager recipes, read the reviews on them, and settled on what I was going to try. I went to Maryland Homebrew with my scribbled notes in hand, made my purchase and started the brew.
My "lab notebook" from that day


A post shared by Karen (@kiirenza) on
The next day, I was asked by a friend who is a professional brewer and saw the Instagram post, "What are you trying to do?" When I told him, he asked, "You do a secondary fermentation, right?" When I nodded, he said, "Add the cinnamon there. Just nuke it for a few seconds, then drop it in."

So, a week after I started the fermentation, I transferred it to the secondary, which is just a glass carboy. You really don't need to do secondary fermentation if you don't care about the clarity of the beer you are brewing, but it helps reduce the "floaters" of hop residue and other stuff that can get sucked up in the siphon if you aren't careful. It's also good for if you want to mimic barrel aging and stuff like that.

Keep in mind, this is the second beer that I ever brewed, so I was being really ambitious with this!

Just over two weeks later, I bottled the beer so that it would end up being ready while I was on a nearly three-week road trip with my mom. Not really the best timing, but I took two bottles with me so that I could try it out the "day" it would be "ready".

And it turned out that I liked it, a lot. So did my husband, and my friends. One of my friends said it was "the perfect fire pit beer." I ended up rebrewing it right away so that I could enter a batch in the yearly Baltimore area "Chilibrew" homebrew contest. It didn't win, but I did get a callout as an "honorable mention" by the professional brewers who were judging it.

Since then, I've brewed some variants that really just add different flavors in the secondary. My Smoldering Yule Log adds some cloves and nutmeg to make a "holiday version."
I did an autumn version with pumpkin and pumpkin spices, but I didn't like it very much. I also recently did a Spring version with raspberries and cacao nibs that turned out pretty good; that one is called Smoldering Cupid. I've also done "barrel aged" versions of Smoldering Fire and Smoldering Yule Log that start with soaking oak chips in a distilled spirit of choice (I use either bourbon or whisky).

So, for those who just want the recipe, here you go :

Smoldering Fire Recipe

Ingredients List

  • 1.5lbs Carapils/Dextrine, crushed 
  • 1lb CBW Pilsen Light dry malt extract
  • 3.3lb CBW Pilsen Light liquid malt extract (2)
  • cinnamon sticks (7-8)
  • 1oz. Cascade hops (1)
  • 1oz. Czech Saaz hops (2)
  • White Labs San Francisco Lager yeast (WLP810)
  • 5oz. of priming sugar (corn sugar)
Bring ~2.5 gallons of water to between 145-150F. Using a cheesecloth bag, steep the grains for 40 minutes. Squeeze the grain bag as it is removed. 

Bring the wort to a boil. While stirring, add the dry malt extract and the liquid malt extract. If necessary, return to boil.

Set a timer for 60 minutes. Quickly add the Cascade hops and 3-4 cinnamon sticks (about 0.5oz total) and start the timer. After 30 minutes, add 1oz. of Czech Saaz hops. After 15 more minutes (total of 45 minutes elapsed), add 1oz. of Czech Saaz hops. After 15 more minutes (at the end of the 60 minutes), remove the wort from heat and start cooling in sink by surrounding the brewpot with ice. 

While the wort is cooling, sanitize the primary fermentation bucket, siphon, thermometer and any other utensils that will be used. Add about 1.5 gallons of cool water to the fermentation bucket. Once the wort is about 80-90F, use a siphon to transfer it to the fermenting bucket. Avoid adding the dregs (hops) from the bottom of the pot. Add cool water to bring the total volume to about 5 gallons, then stir with sanitized paddle or spoon to make sure wort and water are mixed. Check the specific gravity; it should be about 1.065-1.075.

Once the wort is below 80F (check with a sanitized thermometer), pitch the yeast, then close the fermenting bucket. 

After ~7 days at 68-72F, use a sanitized siphon to transfer the beer to a sanitized secondary fermenting vessel. Take a sample to check the specific gravity. Avoid transferring the dregs from the bottom of the bucket. Add in 3-4 sticks of cinnamon that have been put in ~1/2cup of water and microwaved on high for 30 seconds. Seal the secondary vessel (cover with a blanket if necessary). Specific gravity should be about 1.012-1.018.

After ~5-7 days at 68-72F, transfer the beer to a bottling bucket. Boil 5oz. of priming sugar in 2.5cups of water; cool and then add to the beer. Mix with a sanitized spoon or paddle. Sanitize and dry all bottles to be used, as well as the caps if not using swing-top bottles. Fill each bottle just to where the neck of the bottle begins, then cap. You can check the specific gravity one more time; it should still be in the 1.012-1.018 range.

Let the bottles stay in a cool (68-72F) and dark area for at least a week and a half for carbonation. It's better to wait at least two weeks before refrigerating any of the beer and enjoying it. 

Let me know if you try the recipe! And check out my previous post that includes information about basic equipment if you need it!

If you find that Maryland Homebrew doesn't ship to your address for some reason, and you don't have a homebrew shop local to you so you want to order materials via Amazon, here's a shopping list for you to get started. Please try to shop local, though; you can't be guaranteed that things you buy via Amazon will be fresh!


Wednesday, April 15, 2020

COVID Quarantine : Stress Brewing

In between mind-numbing online meetings, responding to work email and grading papers, I have tried to continue some hobbies. One of those is something Pat and I started doing a few years ago -- homebrewing.

A week and a half ago, I started a batch of beer that I think I'm going to call Boxer Rumble. Pat's been on a Belgian kick, and told me that I should brew a Belgian tripel. I decided to go for a quad because, well, I don't know any three cylinder cars.

I looked for some base recipes on the American Homebrewers Association website, and decided to start with the Easter Quad recipe by Michael Tonsmeire. This is an all-grain recipe, and I don't really have a set-up for doing all-grain (not yet, at least!), so I did some modifications to incorporate malt extract. I also only wanted to do a five-gallon batch, so needed to divide everything in half.

I used the AHA "cheat sheet" to partially convert the recipe to extract, then placed an order with Maryland Homebrew to get the ingredients. With the stay-at-home order and closure of all business except those deemed "essential," it's nice to know that 1) a homebrew shop actually falls under "grocery store" and can stay open, and 2) Maryland Homebrew is close enough to me that if I order on Monday, I will have the order on my doorstep on Tuesday.

The special ingredient with this recipe is pomegranate molasses, which was the singular thing that the homebrew shop didn't have. I broke down and ordered it via Amazon, though in the future, I'll look for it in the international aisle of the local grocery store.

It's just like keeping a lab notebook!
The beer was transferred to the secondary fermenter last Sunday, and the pomegranate molasses was added. This is what it looks like right now.
Fermenting happily
I'll wait for the yeast to wind down (a few more days) before bottling it. The initial taste-test during the transfer (pre-pomegranate molasses addition) was good. I was afraid I might have added too much cardamom seed.

If you are interested in getting started in homebrewing, I'd suggest starting by ordering a DIY kit and following the directions. You'll need some basic kitchen utensils, including a 5 gallon pot, for boiling the wort, and then the "fermenter(s)", which at a basic level, you can get away with just using a plastic bucket with a sealing lid. Maryland Homebrew is my local shop that sells everything you could want or need to get started.

Here's what Pat and I bought to start us off :

Pat already had a 20 quart stainless steel pot we could use. 

It's funny that this whole endeavor started because a lot of craft breweries had discontinued making black IPAs, which is why that was the first kit we bought. 

By the way, if you decide to purchase the materials from Maryland Homebrew, consider also joining the American Homebrewers Association; MDHB offers a discount to AHA members. Other homebrew shops do, too. 

If I'm bored later, maybe I'll post up my recipe for my Smoldering Fire beer that my friends like so much. In the meantime, you can also check out my videos from when I brewed a beer with honey (Sweet Ride, Hon!). 


Saturday, April 11, 2020

COVID Quarantine : Separating Work and Play

One of the most exhausting things about working at home is making sure to separate work from personal life. As a teacher, especially a department chair, I already know how difficult it is to create borders in a digital world. Checking work email while at home was something I finally put a stop to during this school year.

Then the governor's orders came down, and school closures through April 24 have me checking work email, text messages from administrators and students, and more. After a near mental breakdown during the first week of closure, where I ended up barely getting out of bed for five days straight, I made some personal commitments where I will not check or respond to work emails or texts. I have been adamant about these personal boundaries over the past three weeks, to the point of refusing to accept meeting times that would interfere.

I've also started looking at ways to expand that separation to dividing personal and pseudo-work, as well. Since I was accepted into the Subaru Ambassador program in late 2016, I've been using my Triskelion Racing Facebook page, as well as my personal Twitter and Instagram as part of my brand ambassadorship. Earlier this week, I took the opportunity to separate out that as well.

Go ahead and give the accounts a follow on Instagram and Twitter!

Maybe next, I'll start working on some things for my Etsy page, considering I should have a lot more free time (and, sadly, less income) this summer.